Discount up to 20% for first purchase only for new customers.
Motion Tracking takes time while editing the videos. In this article, we will learn How to use Motion Tracking in Movavi Video Editor Plus 2023. This article will help you to understand the basics of Motion Tracking and you will also know what Motion Tracking is.
Affiliate Disclosure: We work hard to find and share discounts and coupons with you from various companies. Through this, we earn some money when you make a purchase from our referral link. This will help us cover all website expenses we share with you free of cost. Learn more
See Also
Movavi Video Editor Plus is a very popular and easy-to-use video editor. This editor is also used by many YouTubers and also content creators. In a recent 2023 update, Movavi added more features like AI Backrounds Removal, Audio Deniose and many more. This article will completely help you that How to use the updated feature of Movavi called Motion Tracking and make your videos more awesome.
In video editing, motion tracking tracks the movement of people or objects. It’s used to match the movements of any objects in your footage with additional elements such as captions, stickers, or masks. Motion tracking also comes in handy when you want to blur or highlight certain parts of your video.
Motion tracking is used in many News for highlighting any object, person or place. This feature is also used in movies to track the object for VFX Effects.
Many software like FIlmora, Premiere Pro, Vegas Pro and Corel Video Studio provides this option to track the motion. Every software has its own functionality to track the object. The motion tracking app on iOS and Android is also used. We will learn how to use it in Movavi Video Editor Plus 2023.
Let’s take a look that how to use this feature in Movavi Video Editor Plus 2023. If you have purchased the license Movavi Video Editor then this feature will work perfectly.
To use this feature let’s learn and follow the steps.
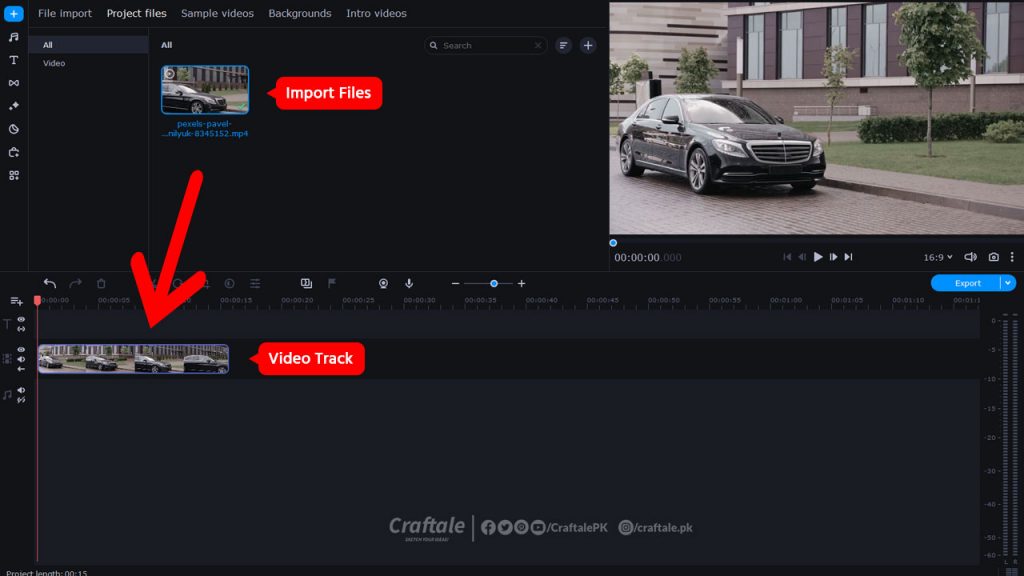
Click the Add Files button or Press Ctrl + O button combined or simply go to File > Add Media Files. Select the videos you want to use. The videos will appear in the Media bin. Drop the files onto the Video track on the Timeline.
Follow the instructions provided in the above picture for better learning.
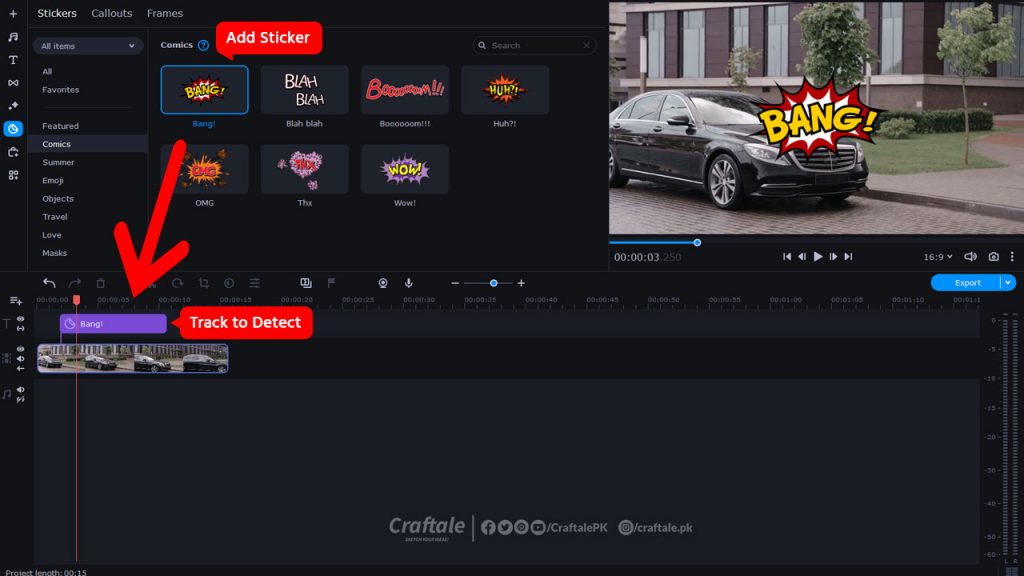
When you import the file then it’s time to add some stickers and Text for tracking. We will add a sticker for tracking so that you easily understand the use of Motion Tracking in Movavi Video Editor Plus 2023.
Open the Stickers tab. Choose a caption and drag it onto the Titles/Overlays track on the Timeline. You’ll see the Clip Tab in the Clip Editing section.
Movavi Video Editor Plus 2023 is very popular and easy to use software. We know it’s hard to take decission to pay too much amount. We have already share it’s Coupon Code so that you save your money on any purchase. Click on the link below to save your money. 👇👇
Movavi Video Editor Plus 2023 40% Off Coupon Code (Verified)
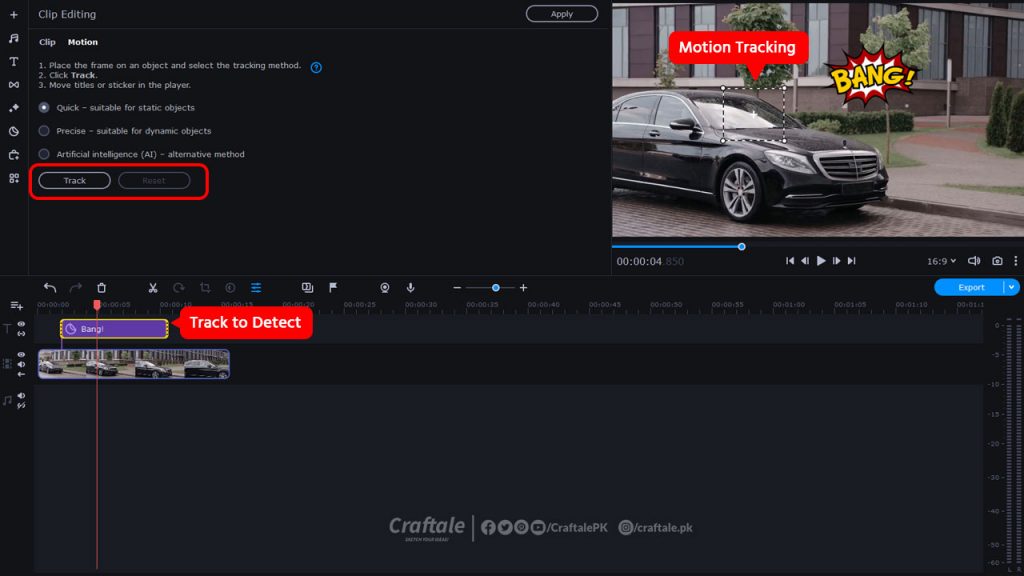
Now time to track the object for smooth playback. Open the Motion tab in the Clip Editing section. Place the frame on the target object and select the desired tracking method.
Here you will see different options
Select your desired option depending on the situation and click Track.
This motion-tracking video editing app will start automatically getting the required information.
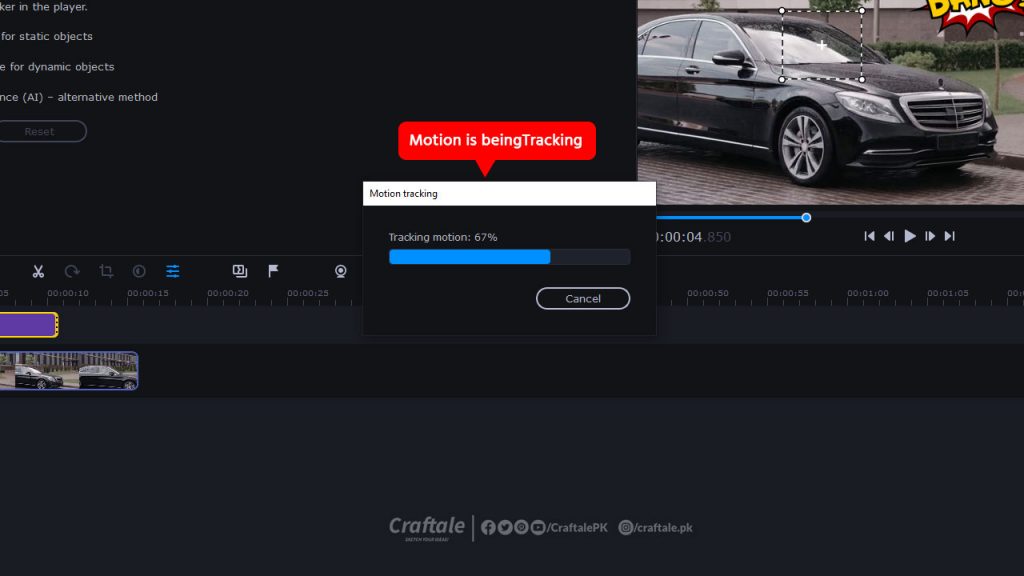
In the above image, you can see that Motion is Being Tracked automatically.
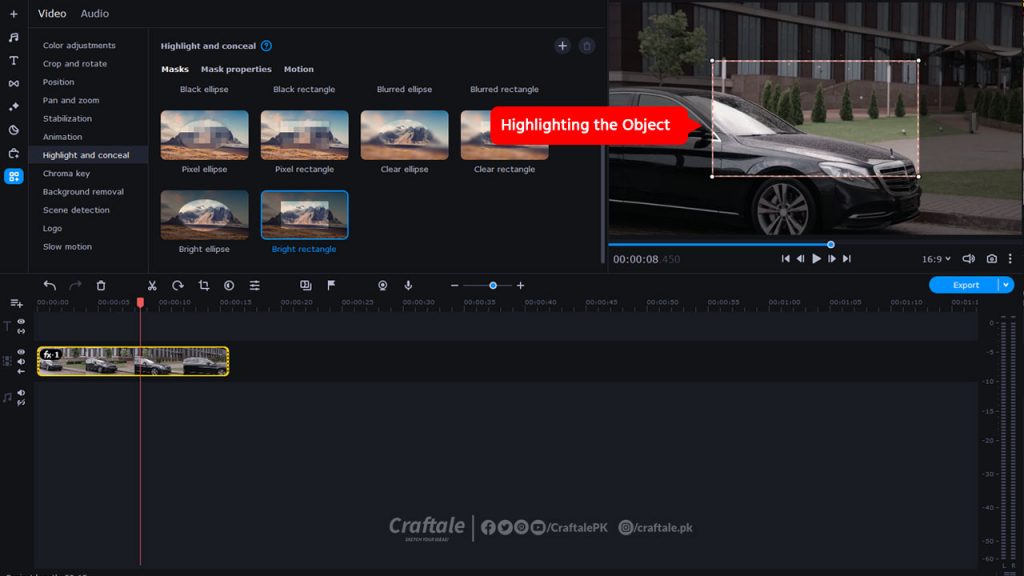
If you listen to or watch the news then you can see that a specific part of the video is circled or shaped. This is called object motion. Movavi Video Editor provides this facility to track the object while walking.
Open the More tools tab and choose Highlight and conceal from the video-editing tools list. Click the Masks tab. Select the clip on the Timeline and the mask you want to use to highlight the object.
In the Mask properties tab, adjust the opacity and feathering settings.
Open the Motion tab. In the player, place the mask on the object you want to highlight. Select a tracking method from the list. Move the mask to set the tracking area and click Track.
We tried our best that you learn Motion Tracking in Movavi Video Editor in an easy way, We also tried our best to cover all the things as much as we can. This feature will really help you to gain more attraction in your videos and also get more views. If you still need any help you can visit Movavi Help Page.
For more details and upcoming tutorials Like Our Facebook Page or Follow Us on Twitter, you can also SUBSCRIBE to Our YouTube Channel for video tutorials.
Обзор правил и положений букмекерской конторы 1win В этой статье мы подробно рассмотрим правила и положения, касающиеся букмекерской конторы 1win, которая быстро завоевала популярность среди
Enjoy long-lasting relationships with older asian women Asian older women are of the very breathtaking women on the planet. they have a wealth of expertise
Как букмекерские конторы используют искусственный интеллект Современные букмекерские конторы активно используют искусственный интеллект (ИИ) для повышения эффективности своей работы. Они применяют ИИ для анализа данных,
Site Formal Da Mostbet Aqui No Brasil ️ Registro Rápido Mostbet Brasil Cassino Online 24 Several E Empresa De Apostas? Caça-níqueis Licenciados, Grandes Chances, Bônus
100% Original product that covered warranty by the vendor.
You have the right to return your orders within 30 days.
Your orders are shipped seamlessly between countries.
Your payments are secure with our private security network.

Craftale is an online customized printing service website. We give you your business solutions and provide you with customized products with your design.
One Response
Hi thanks for sharing your thoughts, you can use it by cropping the video or using freeze frame.